
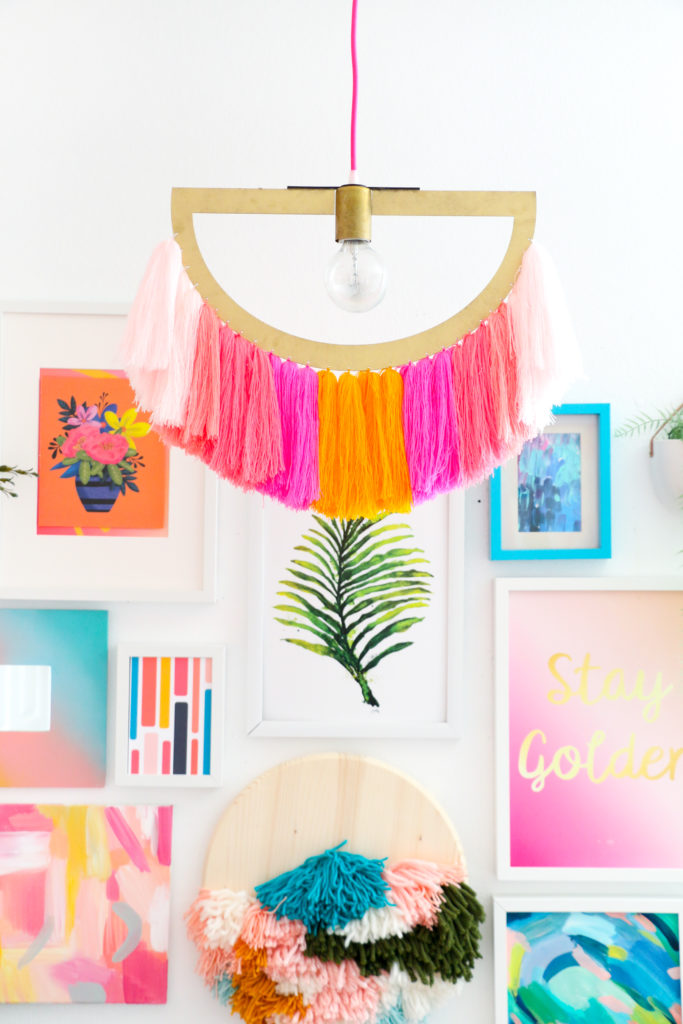
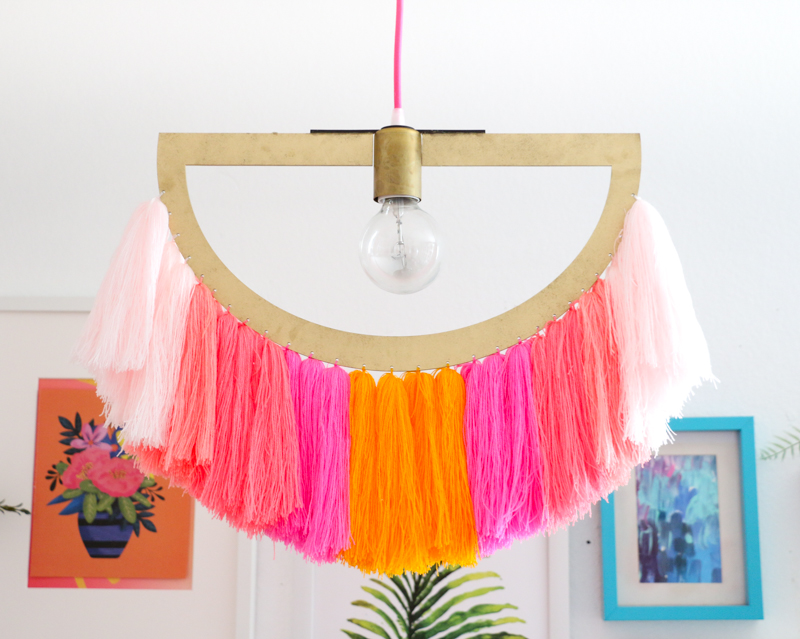
Oh my goodness am I excited for today’s project. I have been dying to share this DIY yarn fringe pendant light with you since I finished it last week.
It has sparked a new love to creating lighting fixtures in me! So watch out for many more ideas to come! But in the meantime, just take a look at this gorgeous DIY pendant light and freak out over its beauty with me, won’t you?
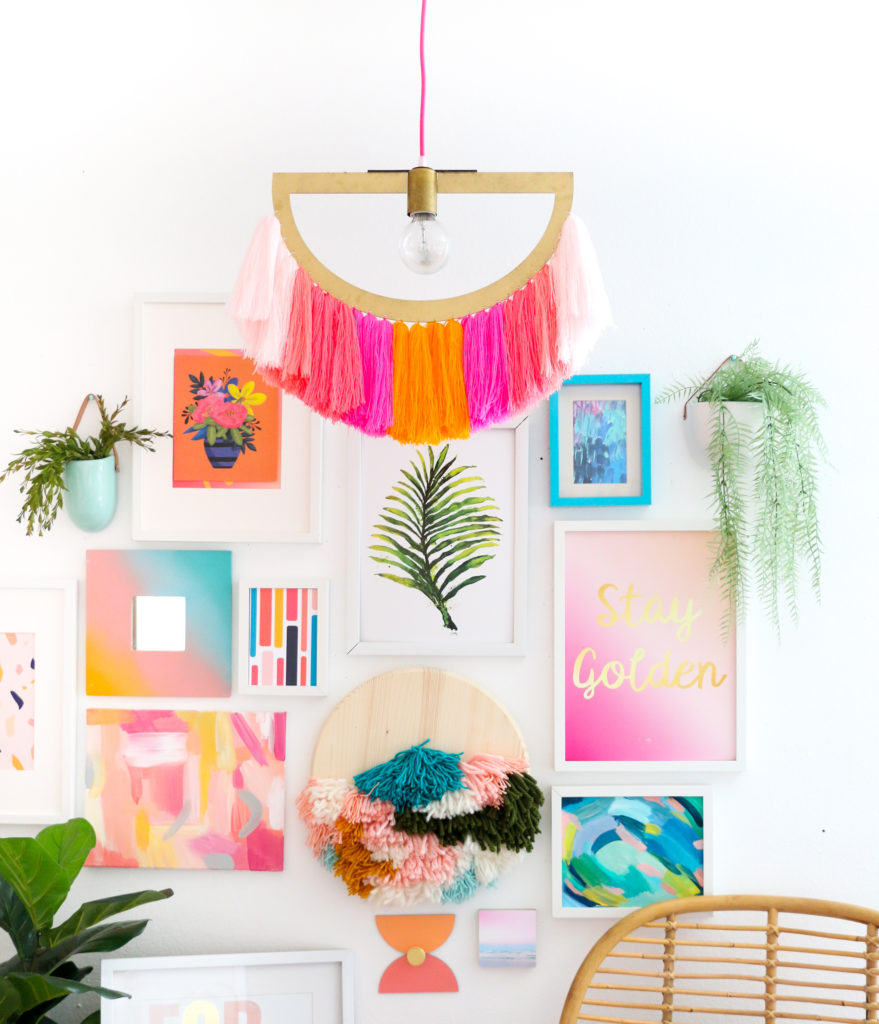
I’ve died and gone to amazing lighting heaven!
So, let’s talk about how I made this thing shall we? It all started with a laser cut wood piece that I used as the base of the light fixture. I then used my new favorite Omegacryl yarn to make long tassels and attach them to the wood piece and then finished it off by pairing it with a DIY light kit from Color Cord. Don’t worry, it is a totally doable project. I am even selling the laser cut piece in my shop so that even if you don’t have a Glowforge, you too can make this light for yourself!
MATERIALS:
- This Laser cut piece (choose from mdf, plywood, walnut, or acrylic)
- Omegacryl
- Socket Cover
- Cord
- Canopy
- Socket
- Wire cutters
- Scissors
INSTRUCTIONS
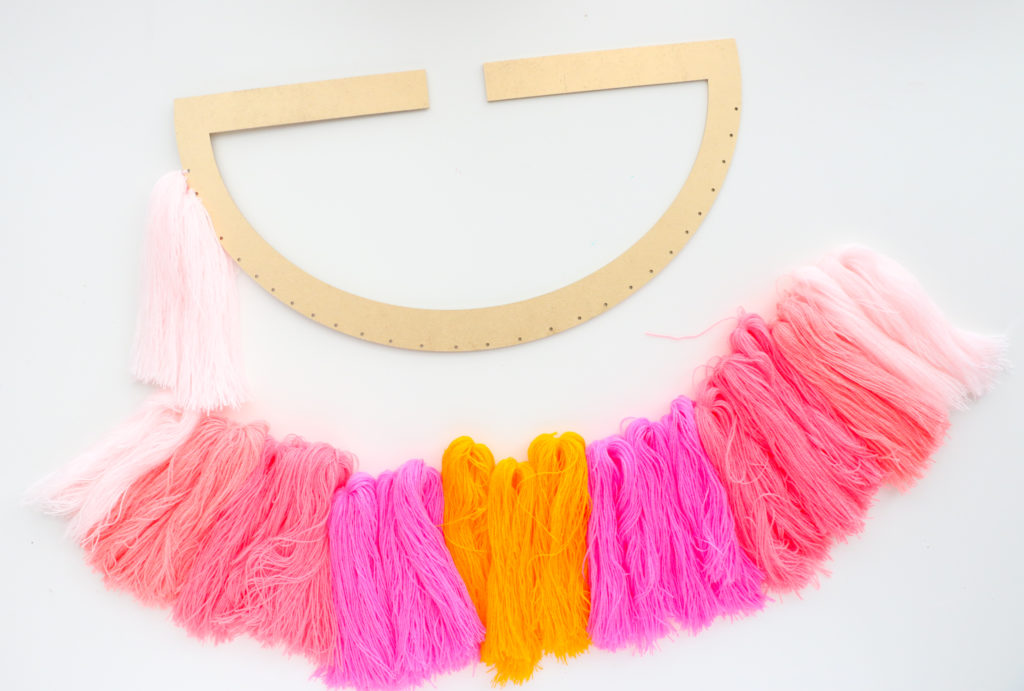
Once you have your pieces all in place, you will want to make enough tassels to tie one tassel at each hole in the laser cut piece. You can make these any color you want (I of course went with pinks, but I think an all black fringe light would be amazing!). The tassels are very simple to make. Just cut a piece of cardboard to the length you want your tassels and wrap the yarn around the cardboard until the tassel is as thick as you like. Then tie a piece of yarn around the yarn through the top of the cardboard and cut the yarn at the bottom (on the other end from where you tied it) to create the tassel.
Once you have your tassels, use the piece that you tied around the top of the tassel to thread through the holes in the laser cut piece and tie them in a knot.
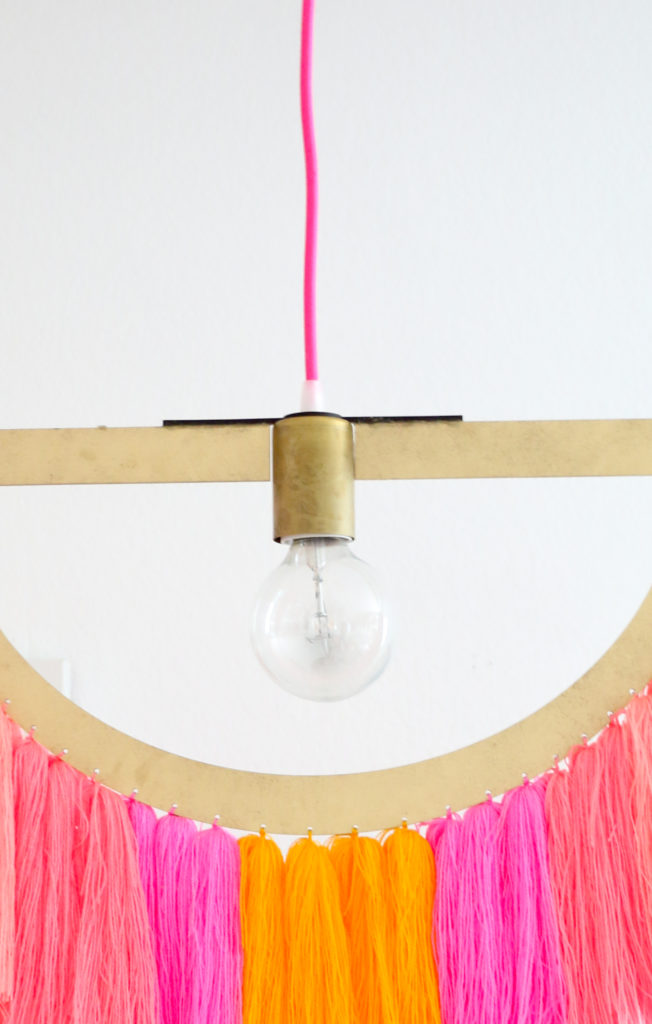
Finally it is time to assemble your light fixture (I recommend looking at the instructions on the color cord site), then thread the end of the cording through the hole in the top of the laser cut piece and mount the light through the canopy onto the ceiling.
If you want, you can also use a plug in cord and simply drape the cord around a hook in the ceiling and then plug it in instead of mounting it.
THE RESULTS
The laser cut piece is sized to perfectly fit the Color cord light socket cover and when I painted my MDF laser cut piece gold with spray paint, it blended so well with the brass socket cover.
What is great about this project is that between the tassels, the laser cut piece, and the color cord DIY light kit, you can make literally thousands of combinations! How about walnut wood with a copper socket cover, and black cord and fringe? Or an all pink version for a kids room? Or a clear acrylic, gold socket cover with navy blue fringe? See?! SO MANY OPTIONS!
Okay, okay, enough yelling! But can you tell how excited I am?! Now who is going to try to make their own DIY yarn fringe pendant light?
0 Comments